
This post is the first part of a multi-parts series on how to use Kiwi Sizing to improve your conversions.
Whether you’re a new shop or an experienced business, adding size charts to your clothing products is an indispensable step to a functional and optimized product page. Being in the business for many years, we have seen many common issues people have with regards to size charts:
- Reusing the size images given by their vendors or suppliers. This leads to an inconsistent experience for your customers.
- Missing unit conversion features. Our target consumers are often multi-national, and size charts should make it easy for both people who prefer centimeters and those with inches.
- Not having size chart in product pages. We often see shops with only a standalone size guide, but it is best to have size charts directly next to the add-to-cart button to reduce the chances of buyers dropping off.
With Kiwi Sizing, you can set up size charts most optimized for conversion. The tool is intuitive and you can create and manage tens or even hundreds of different size charts in 1 place.
This article will walk through the steps to set up your first size chart using Kiwi Sizing. Note that while we will use our Shopify as an example but the tool can be used for any other e-commerce platforms such as BigCommerce, WooCommerce from Wordpress, 3dcart and Magento.
Video: How to add size charts without coding
Now let’s get started!
Installing the Kiwi Sizing Shopify app.
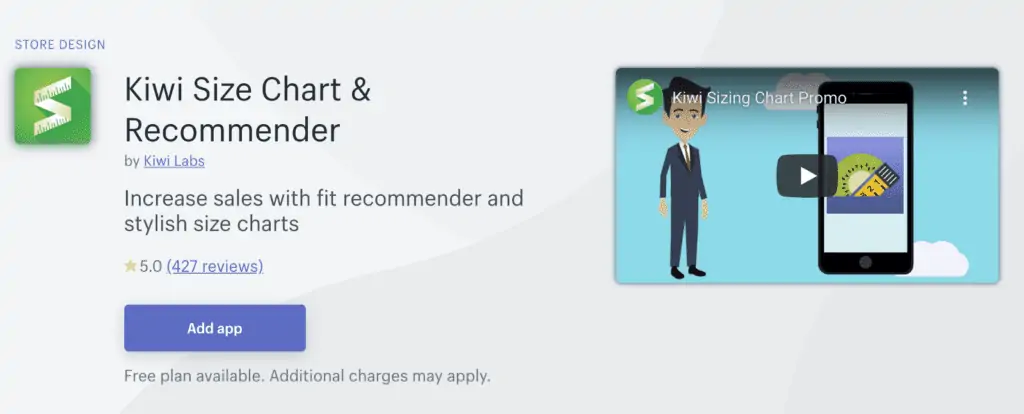
First thing to do is finding our app on the Shopify app store. You can search for Kiwi Sizing in the app store, or use the following link:

Click “Add app” to install us to your Shopify shop.
Start creating size chart
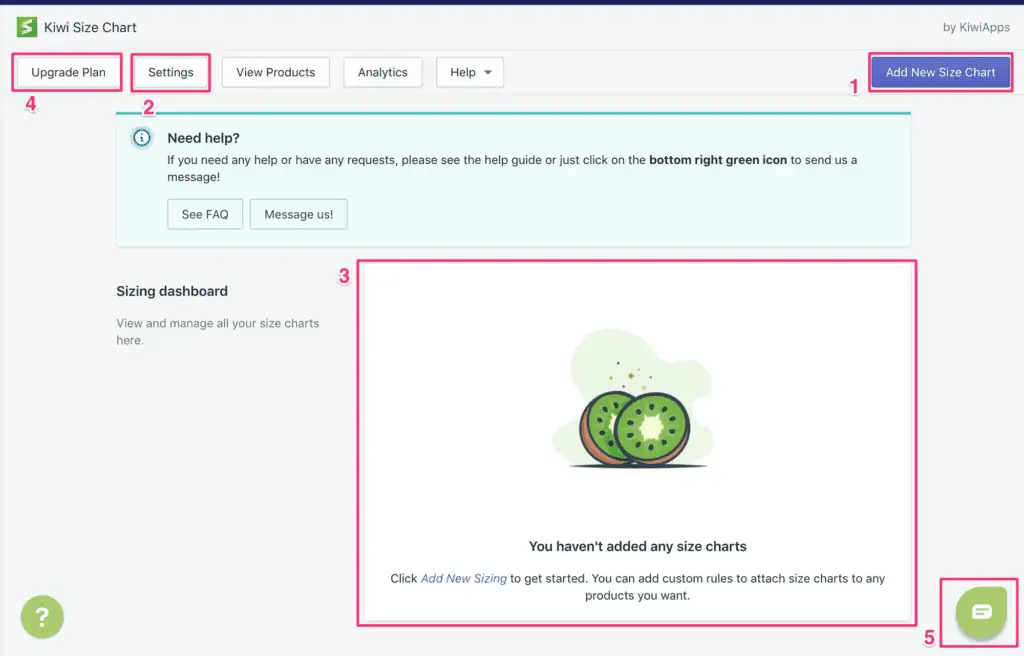
Once the app is installed, you will be in our dashboard page. There’s a few things here:
- Click on this button to add a new sizing chart.
- update the settings to customize the layout and style of the sizing charts.
- See all the size charts you have created in this dashboard view.
- If you like the app, click on this button to upgrade to premium plan!
- Click on this green icon to use our real-time chat. Ask us any questions.
Click on the “Add new size chart” button.
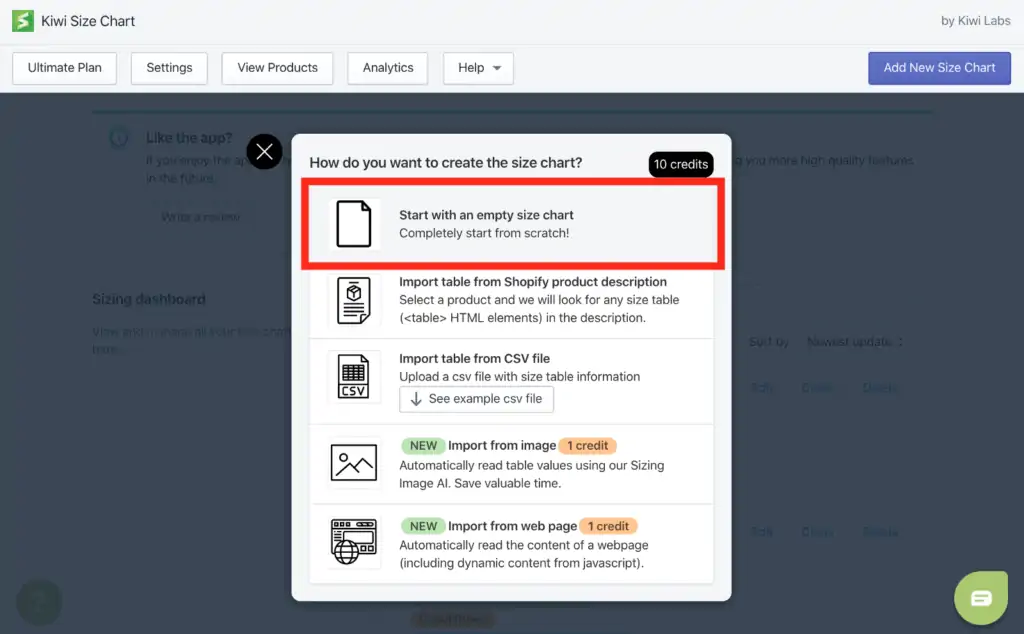
Now a pop-up will show up. Kiwi Sizing offers a variety of ways to help you create size charts. Besides the most basic way of creating one from scratch, you can also set up size charts using
- Importing HTML table from your Shopify product descriptions
- Import table from CSV files
- Automatically detect size chart data from images using our Sizing Image AI
- Automatically detect size chart data from web URLs
Needless to say, we are obsessed with coming up with ways to make it easier and quicker for you to set up a size chart.
This guide will only walk through the most basic method. So click on “Start with an empty size chart” to proceed to the next step.
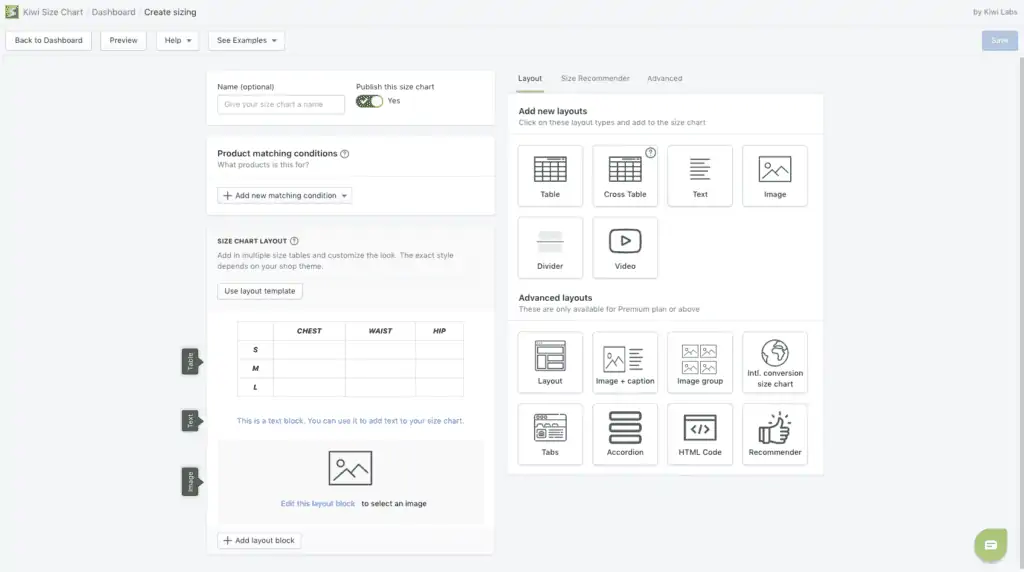
Now you will see the size chart editor. The left section has a Size Chart layout preview. That is the content of the size chart.
Set up size table
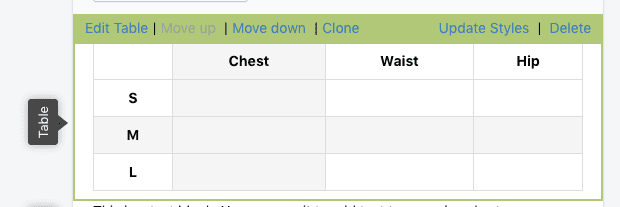
Now move your mouse on the table, and you will see a green bar with various links show up. Click on “Edit table”.
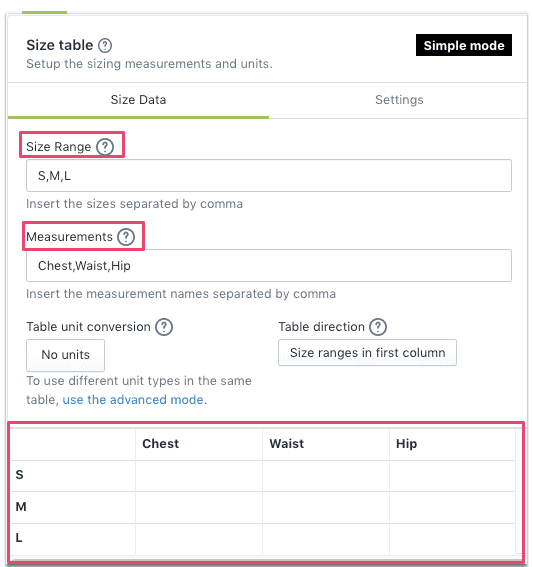
The size chart editor will show up. Put in the measurements into the table. You can type in “Size Range” and “Measurements” input.
✏️ Pro tip: the table area works similarly to excel or google sheet. You can press “Tab” or navigate with the arrow keys. Ctrl-z would undo changes. Press the +row or +col to add new rows and columns.
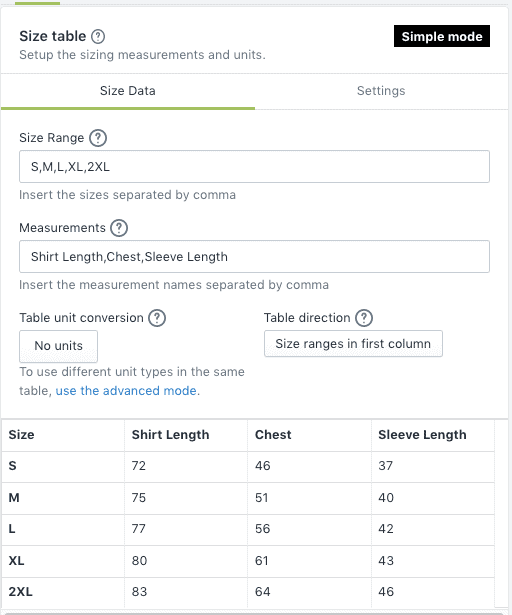
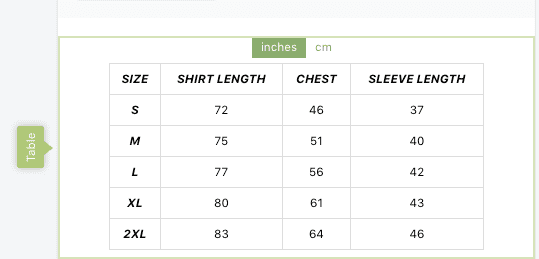
Now you should the table filled out like this:
Set up table units
Click on “Table unit conversion” button.
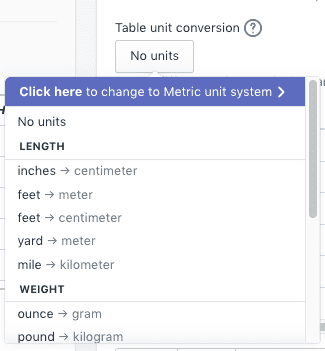
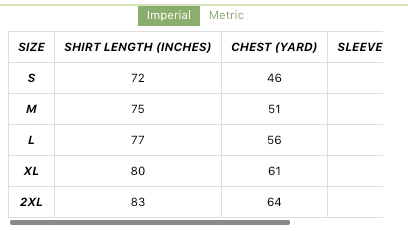
You can select from a wide set of different units. Click on the purple button to toggle between metric and imperial unit system. One you set up a unit, the preview will immediately show up unit conversion buttons like below:
Now, you may wonder what if you want more than 1 units in a single table, for example having both cm and kg? That is possible!
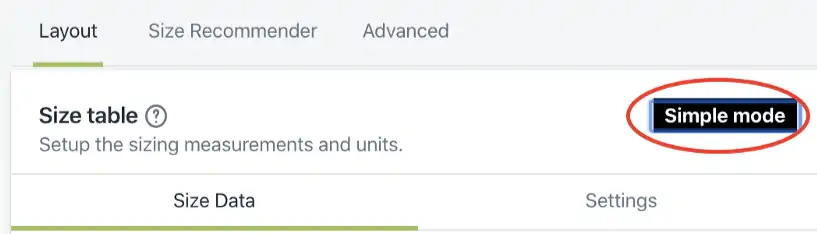
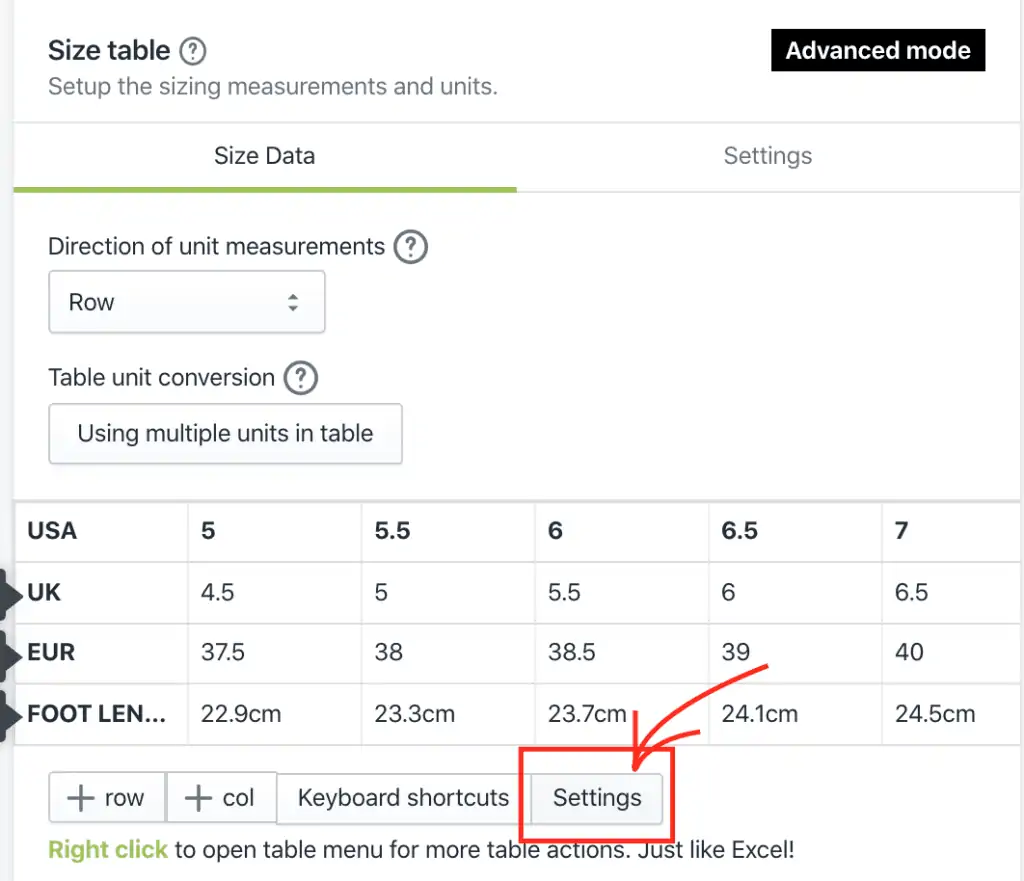
You may notice a black box on the top right of the table editor. You are currently on the Simple mode. If you want more advanced features like multiple units in the table or merging table cells, you need to use the Advanced mode.
Now try clicking on the black box and change to the advanced mode.
You will see black arrows show up.
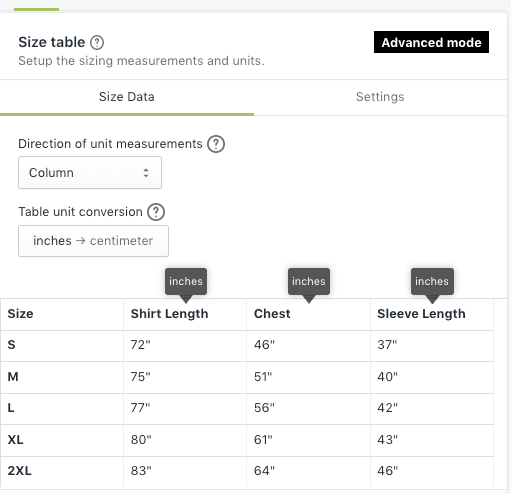
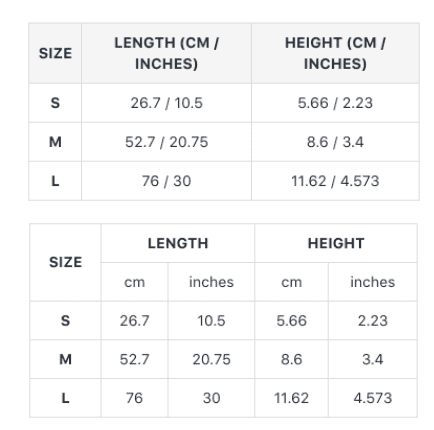
You can now change the units on an individual row or columns basis by clicking on the black box! See how the below table has both yard and inches?
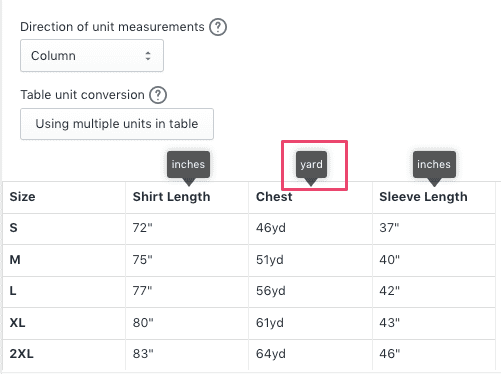
Note that when you have more than 1 units in the table, the unit conversion button would show up as “Imperial/metric”!
✏️ Pro tip:If you want to display multiple size tables in the size chart, you can click “clone” to duplicate an existing table so you don’t need to start from scratch!
If you’re buying children’s clothing, this international size conversion chart for children’s clothing will help you get the perfect fitting clothes.
Customize table styles
Kiwi Sizing offers a ton of customization options within the app without needing to write a single line of CSS. Click on “settings” within the table editor
You will see a settings section show up.
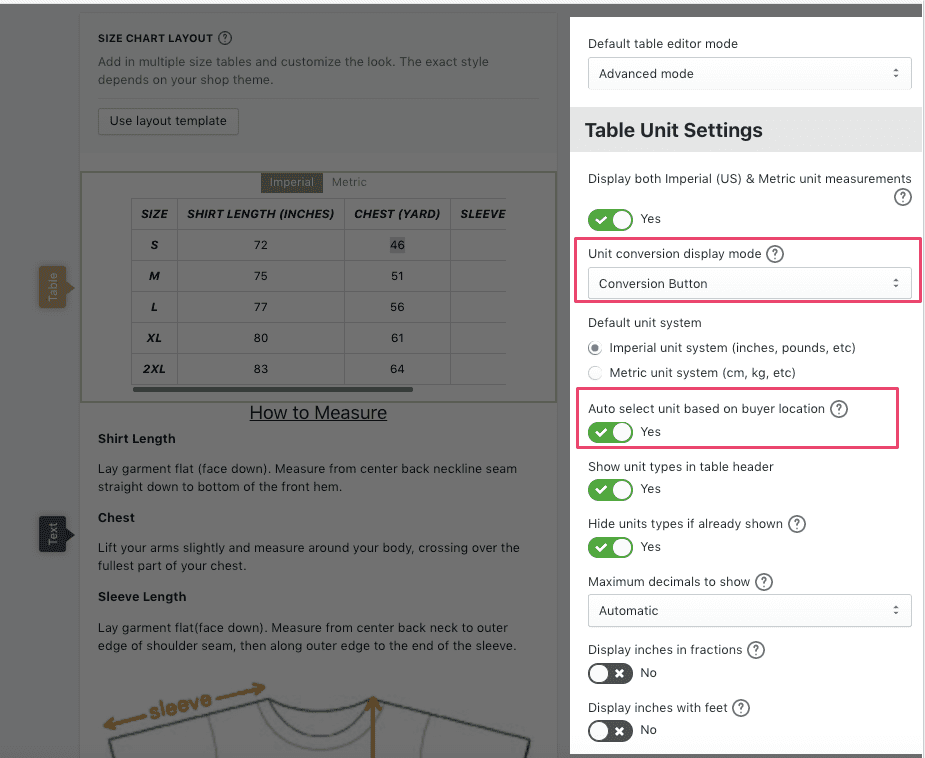
There are a lot of options, but a few notable mentions:
- Unit conversion display mode: You can decide how you want the unit conversion to be shown. It could be as buttons, inline text or inline cell:
- Auto select unit based on buyer location: this setting would pick the unit system based on the buyer’s geographic location. This means that buyers from the US will see inches first whereas folks from other places will see centimeters.
Scroll down, and you will see the Table Styles section. Here you can start customizing the styles to fit within your shop branding. Every changes you make, you will be able to see it in the preview on the left side.
✏️ Prop tip: All the settings option can also be accessed by first going back to dashboard and clicking on the settings button.
Add images or other content
Now that you have the table set up, it’s time to add other content to add more informative instructions for your customers to help them find the best fit.
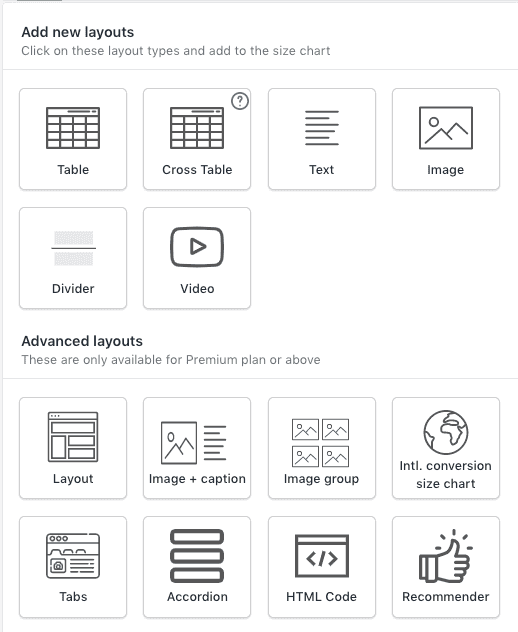
For example, you can add text and image layout block and add in the content you want:
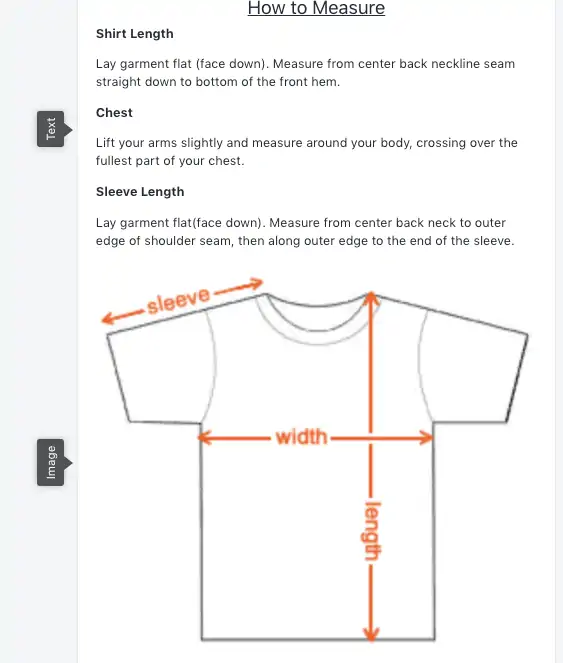
Kiwi Sizing offers a wide range of different layout types. Click “Add layout block” and you will see the selection. For example, you can show embedded Youtube videos to show to how measure.
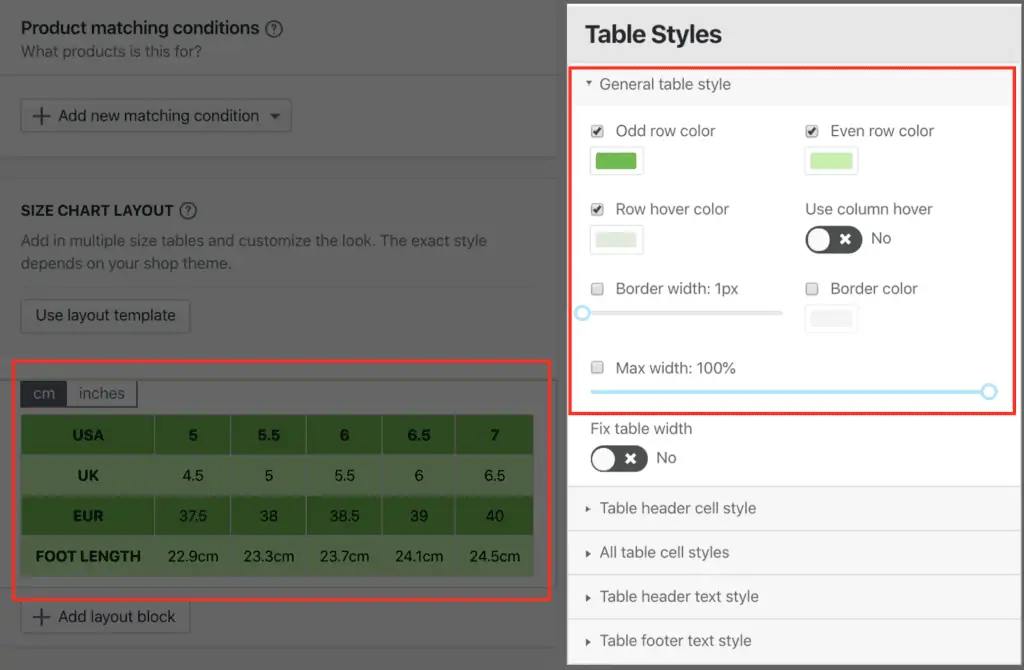
Set up product matching conditions
Finally, set up the product matching rules so Kiwi Sizing knows which products this size chart is for!
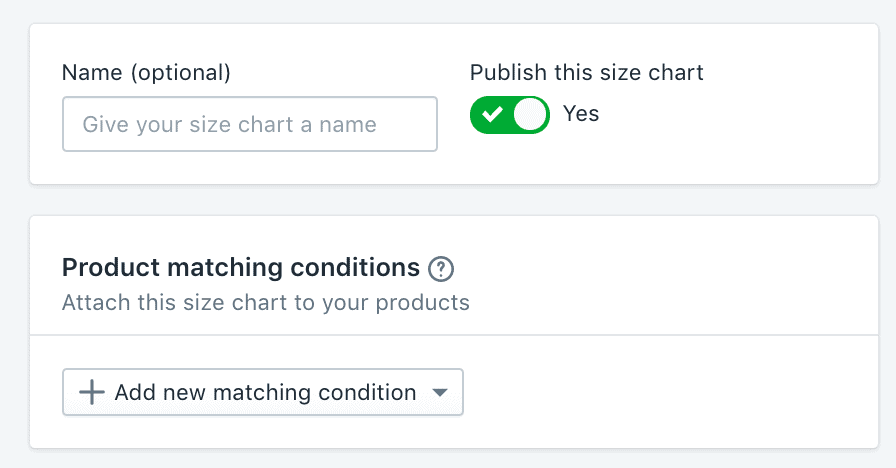
That’s it! Remember to click the save button on the top right to save the changes!
Congratulations on creating your first size chart. You can find out more details about all the feature in other guides.
We also have a Youtube tutorial walking through creating your first size chart:
We are trusted by thousands of Shopify stores with over 400 5-star reviews. Try it now for free and start reducing unnecessary returns.
