
In the previous post, we shared how to use Kiwi Sizing to create customized size chart and using the automatic unit conversion features to help buyers better understand the size information.
Now we believe that having size charts alone are not enough. While they do provide information on the product measurements, they are often not easy to understand and customers don’t always know how to interpret the numbers, let alone knowing their own body measurements to make a reasonable decision on the fit.
This is why shopping online is difficult – you can’t physically try on the clothing before purchasing. And this is why fit problems is the most common reason for returns.
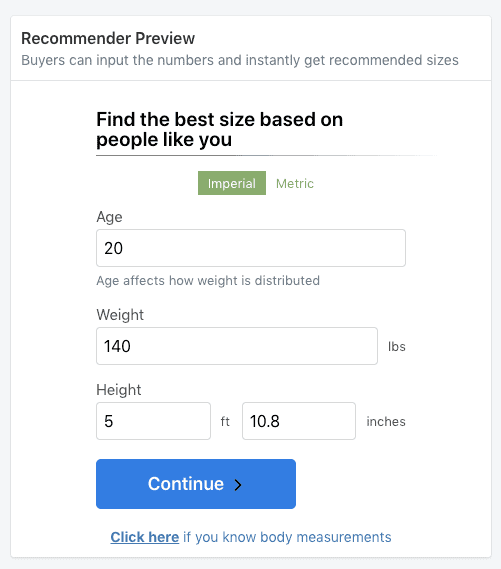
We believe using fit recommenders on the product page can improve the online shopping experience. Customers wouldn’t need to measure themselves to provide a list of their body measurements. Instead, we would only ask for age, height and weight, then we will automatically estimate the buyer’s body measurements and then use that to make a size recommendation.
While the screenshots in this article uses our Shopify app, the process is the same for our web platform as well. So if you’re using 3dcart, Wordpress WooCommerce, or BigCommerce, etc you can continue to follow this post! Let’s get started.
Video: How to set up Advanced Apparel Recommender to reduce returns
Create a simple fit recommender for dress in less than 3 mins!
Let’s say we have a dress to sell. Let’s create recommender for it!
1. Set up your size table
Before we get started, you would need to first create a size table in the chart. You can check out our previous post to see the process.
Once you have a size table done, click on the “Size Recommender” tab. There are 3 types of recommenders in the app, select the “Advanced Apparel Recommender”.
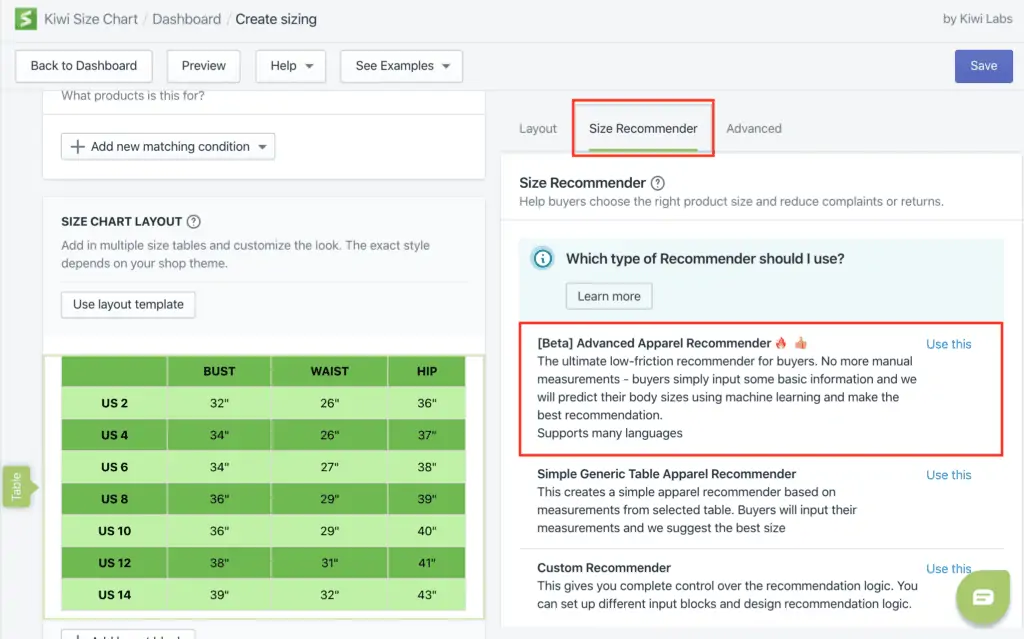
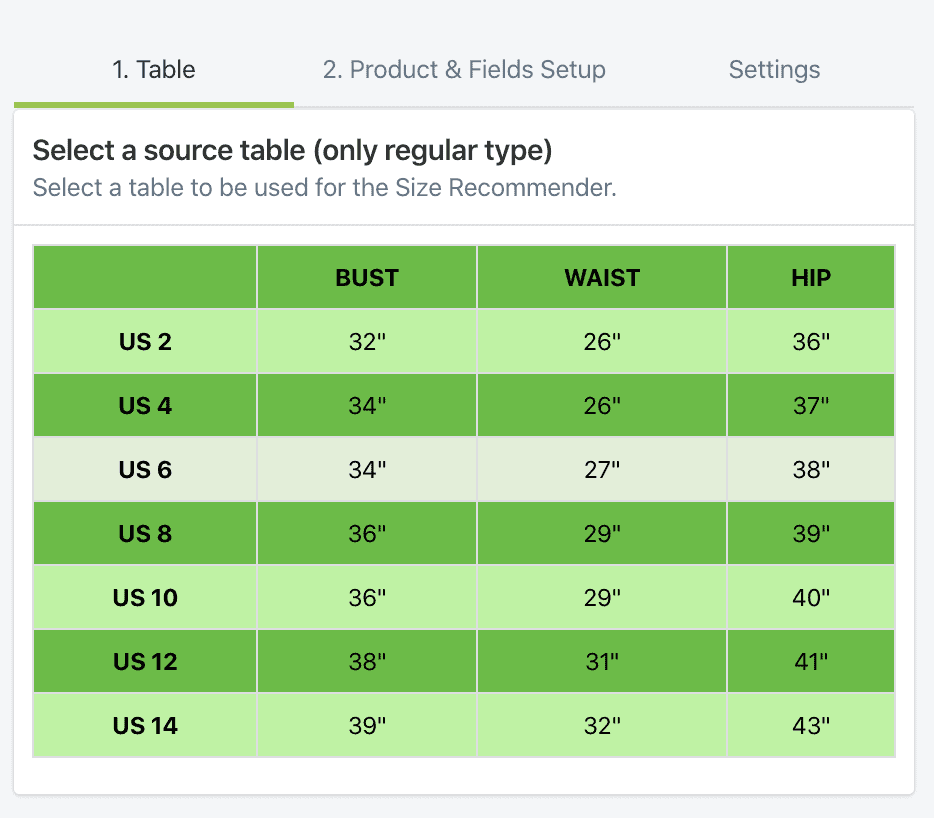
2. Select source table
Recommender uses a size table as a basis for recommendation. If you only have 1 table then it’ll automatically be selected. Otherwise, the app will ask you to pick one!
✏️if you add or remove measurements in the table, then you’ll need to update the recommender as well.
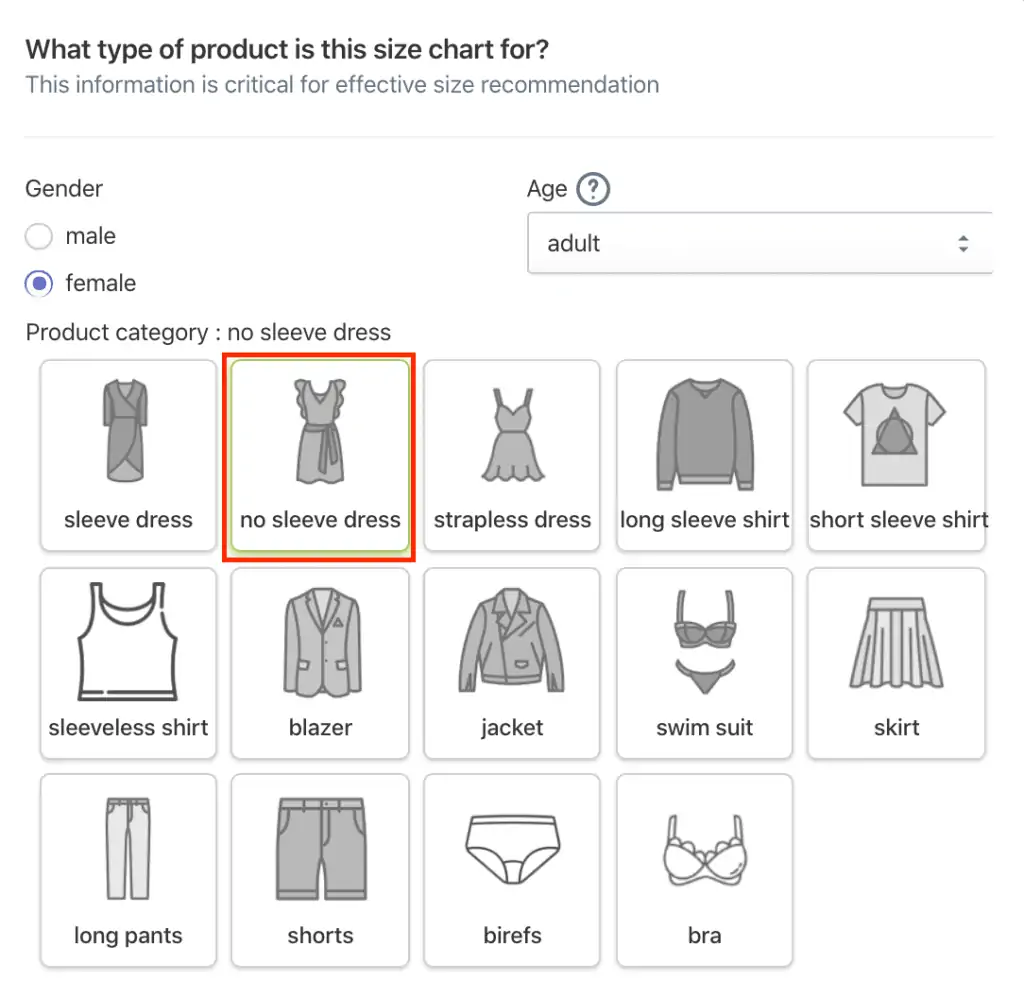
3. Set up product info
Go to the next tab. Set up the product info by selecting the gender and the product category. In this case, we will select female and “no sleeve dress”
4. Select measurement fields
Once that is set up, you will see a new Card show up for selecting fields. This will show the measurements from your table. We recommend selecting one to three of the most important measurements fields. For tops, we require having chest and for bottoms, we require having waist.
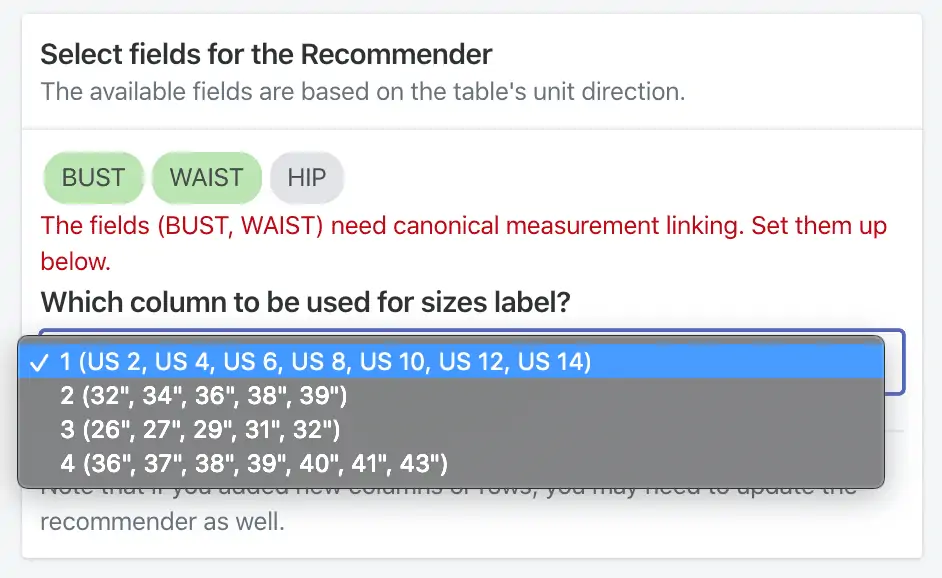
You might see some warning. Don’t worry, we’ll handle this in the next step.
✏️ The advanced recommender currently only works for adult clothing. So it won’t work for kids or pets.
4. Set up canonical measurement
The recommender requires setting up canonical measurement linking so we know exactly what the measurement field represents.
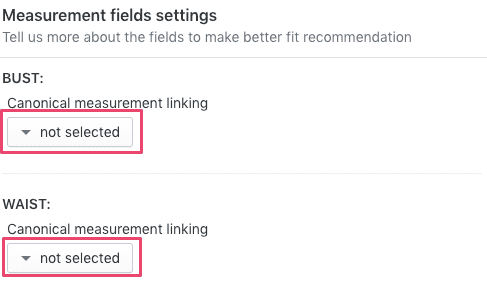
Click on the “Not selected” button. Then you will see a list of measurement fields to choose from. Read the description closely and pick the one that best matches your measurement.
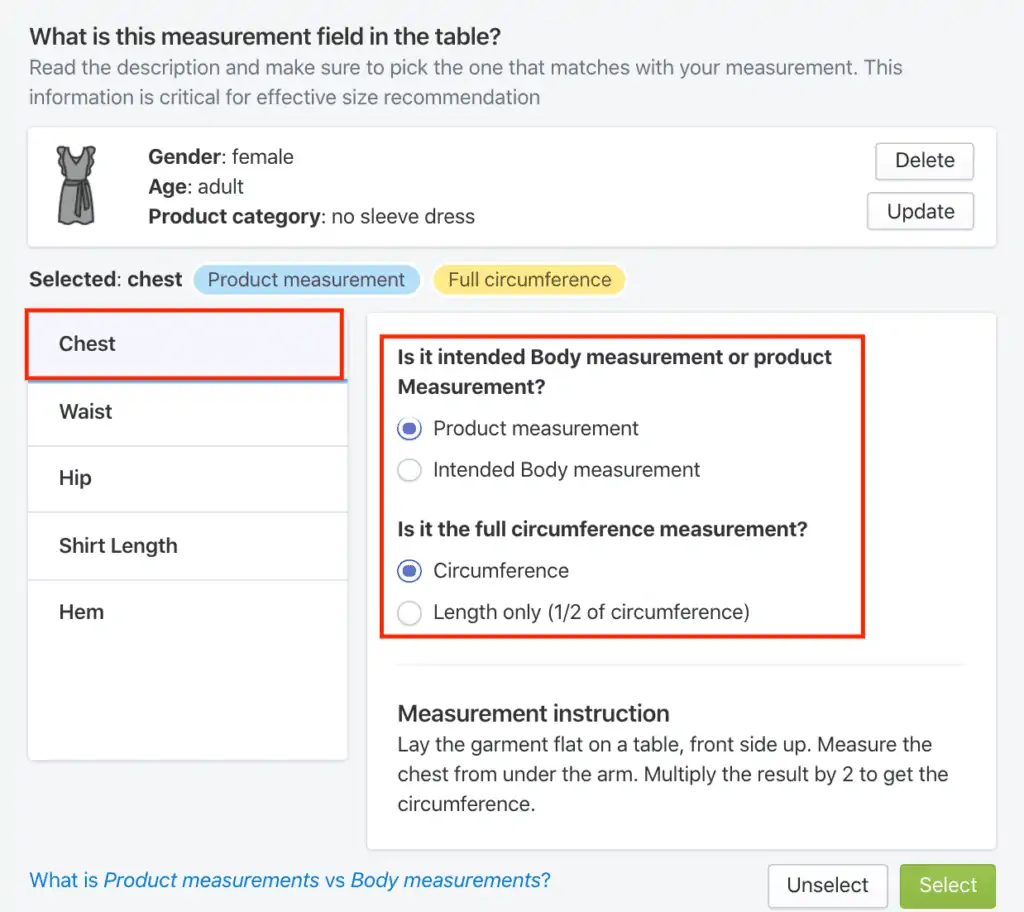
✏️ Be very careful to choose between the product measurement or intended body measurement. If possible, we suggest actually measuring the products to verify whether the numbers on your size table is product measurements or not.
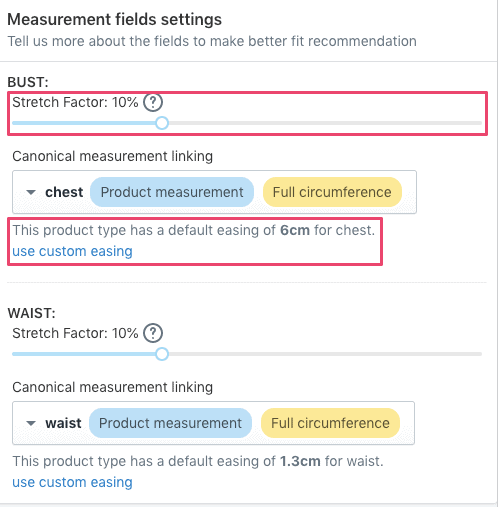
5. Set up recommender config
Once canonical measurement is set up, you will see some new options show up. Typically we would leave stretch factor at 10% unless your material is especially elastic and stretchy. For easing, we also have default numbers depending on the product type. But you can also customize this if you want.
That’s it! Now you will have a recommender for the dress product. You can see the preview on the right side.
There are other settings available as well for you to explore!
If you have any questions, feel free to message us! Here is also a video of the setup process:
How to set up an apparel size recommender to lower returns
We are trusted by thousands of Shopify stores with over 400 5-star reviews. Try it now for free and start reducing unnecessary returns.
- Website:https://www.kiwisizing.com/
- YouTube Tutorials:https://www.youtube.com/channel/UCQpP0NIIALWyMIa6NrFH3dw
- Demo shop:https://demo.kiwisizing.com/
